How to gybe a surfboard
 How To Gybe a Surfboard.
Ok. We all want to carve up waves like this fella on the right.
If you've discovered the joy of slashing waves on your twintip, and are getting into a new surfboard, you need to turn it around.
Unlike the twintips most of us start on, a surfboard (sometimes called a directional) only travels in one direction.
Some crew manage to ride the board in the switch position for half the session, and that's fine. If you're out in gnarly conditions, negotiating white water and chop it can be pretty challenging toeside.
If you want to learn to gybe, read on.
This article is about doing a carve gybe. There are so many ways to turn the board, including stalling and rotating it underfoot, jumping & rotating the board in the air (super stylish!). What we cover here is a sweet carve where you lean into the turn with your toes facing the center of the turn, and flip your feet on the exit.
Most people think it's all about the footwork. Sure, that's a factor, but there are other equally important parts to consider.
To achieve "turning with style", here are some of the things which can ruin your act. If you can master each one, you'll be turning nicely.
1. An uneven water surfaceI believe (and I hope you'll agree) that it's so much easier, faster and more satisfying to learn single pieces, then pull them together. There are some unfairly gifted individuals who seem to nail any sport without any obstacles, but for the rest of us we need to plug away and build it up step by step.
2. Uneven kite power
3. Dodgy carving
4. Muddled feet
5. Looking in the wrong direction
6. Stinking thinking
To get started, if you are unsure of the terminology, here's some explanations:
"Rail" - this is the rounded edge of the board. Designed to slice through water!
"Downwind" - travelling with the wind, rather than across it.
"Bear off" - turn and head downwind.
"Crank it" - to give it curry.
"Bury the rail" - to heavily tilt the board over so the edge of the board is immersed in the water (=turning)
"Kook" - a person in the process of becoming a Jedi Kitesurfing Master.
"Gnarly" - really exciting, challenging conditions.
"Switch", or "Toeside" - as in 'ride switch' meaning riding reversed with your bum facing the kite.
"Heelside" - opposite to Toeside, heel rail in the water.
1. An uneven water surface
If you really want to accelerate your learning, find yourself some flat water. Ignore the people on the beach laughing at you for taking a wave board to a flat water spot and get out there! Why? When you're out the back of the break, it's choppy. Turning on the inside can be filled with white water.
All these lumps are conspiring together to toss you off as soon as you show any doubt in your turn. Just as you move your feet, a weeny bit of chop will upset the board, upset you, and over you go.
By practising in flat water, you take the water condition out of the equation. You'll immediatelly improve your success rate 100%. Once you're comfortable on the flat, then tackle the mild chop.
Can't get flat water? - it is still possible to learn in chop, more tips & tricks on this later.
2. Uneven kite power

Yee-Haa! Photo by J. Keys - Brighton, WA
Head downwind a little, and get the kite turning before you turn the board .. as you head downwind the pull from the kite may lessen (depending on the how hard you crank it, and the wind speed), so at this point, you can sharpen your turn to take up the slack and avoid a stall.
If you're powering downwind, then even more reason to bury that rail, as that's the only way you'll stay on. Without the rail engaged, and no heel/foot pressure on the board, the ocean will toss you off in no time.
Every turn is so different, so take notice of how much the kite is pulling and how sharp you are/aren't turning. The goal is to keep the rail engaged for a stable turn.
Stable kite power comes from the exit of a great turn so...
3. Dodgy turning
Are you going for a hard burning carve, a snap turn, or a stall? To start with a nice gentle carve is the go, and you achieve this by bearing off downwind and getting the kite turning to new position on the new tack. If you've done a nice turn and come out with good speed and balance, and your kite is stable, it's going to make your foot change so much easier.

Perfect Balance. Photo by J. Keys - Brighton, WA
So here is where (1) (2) and (3) come together. Practise your first turns with no intention of following up with a foot change. Just think about going into that turn and coming out in the switch position balanced and composed. Just focus on that.
At the end of the turn, you can fall in, change feet and get going again - the point is that you only focus on getting a tidy carve and excellent kite control so that you come out sweet. You'll probably find that you carve one direction much better than the other, but whatever the case, practise both sides.
The idea is that by not thinking about the exit, your whole brain can be focused on doing an excellent carve.
The core elements of a sweet carve?
Bent knees, looking where you're going (inside the turn), leaning into the turn from the waist (not just bending the top half of the body over), and of course, smooth power from the kite.
Over time, you'll find yourself tweaking your turns according to the wind speed and water conditions. At the start, you might go fairly easy while you get the swing of it. As you get more advanced, you may seek to crank the kite around giving you power to really drive the board through the turn - and what a sweet sensation that is.
4. Muddled feet.
Why is it that most people try their first feet switch when it's 25 knots, you're belting along connected to a powerful kite and there are 2 metre seas ?
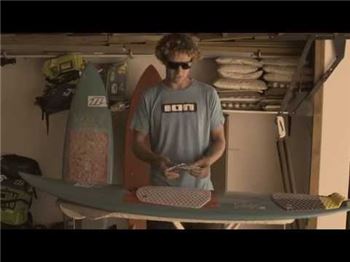
You've no doubt got perfect access to a lawn on a windless day where you can put your board down and practise the foot change to at least get familiar with it.
What we're talking about here is muscle memory. When you first change your feet, you need to think about it. After doing it 100 times, your body knows the routine.
It stands to reason the more instinctual you get it on land, the less you'll fall in when on the water.
1) Take your rear foot out of the back strap and position it on the board just in front of the back strap. (Some folks leave the back foot in, and start at the next step .. try both and see which you prefer)
The idea of taking the foot out earlier is that it buys you extra time (foot already out of the strap) and stability (you can put the tips of your toes more towards the inside rail so that you can really drive the edge of the board through the turn.

2) Take your rear foot and position it on the far edge just behind your front foot.

This all happens pretty quickly, and a few things that helped me were to lift my weight off the board just before the switch, or do the switch when the board is still driving through the turn.
3) Twist your waist to rotate your body and remove your front foot from the front strap and position it just in front of the back strap.
The whole point is to a) keep the board going in the direction it was heading by not burying one of the rails (not upsetting the board) whilst changing your feet, and b) keep enough weight on the board that chop won't throw you off.

4) If your new front foot is in the correct spot, you should be able to rotate the toes into the front strap

... then bring your back foot into the back strap and kite away like a paid professional!
Which brings us nicely to ...
5) Looking in the wrong direction
At this point, you'll probably notice you're looking down. Well, in the world of balance you follow where you look and this is why so many new gybers fall off. Because they are looking at their feet. It's natural while you're learning, and that's why it's a great idea to get the foot change in your muscle memory so when you're out on the salty try your best to look forward and focus on where you're going.
Hope this is all making good sense so far.
6) Stinking thinking
Monitor your thoughts when you're pracisting - are you thinking about yesterdays party, tomorrows events, the boss, work, dinner, cars??!? If you can't shut up the chatter, fill your head with words to help it focus .. "turning, turning, turning"
Maybe you're thinking that gybing is all about "not falling off" ? I've seen guys heading off half way to China because they "know" they'll stuff their next turn, and fall in. They're thinking "the water may be cold", "you lose your board (again)", "I'll turn on that next swell, oh .. maybe the next one" .. "that's too choppy" .. "kites in the wrong spot" .. "too gusty".
These tiny pesky thoughts are the ones that can inhibit the awesome physical machine you are, so get your thinking right. Set yourself a distance limit and turn then, no matter what.
7) Coping with chop & swell.
If you want to stay on the board in chop, swell and heavy seas, whilst turning, you need to handle the bumps. Look at any great carving surfer, kiter or windsurfer and you'll see bent knees. Bent knees gives you suspension to absorb bumps, a lower center of gravity for easier balance, and you have two powerful pistons to drive power through the board when you need it. You need to bend at the knees!
You want to keep your speed up, so don't gybe up the back of a swell. Time your turn off the front of one. Have faith in your new surfboard - it's happiest when a rail is engaged and slicing through the water - if you can keep the pressure on and the speed up, it will literally be like a train track on rails and slice through chop like the proverbial hot knife through butter.
Bring it all together

Burying the rail. Photo by J. Keys - Brighton, WA
1. Smooth water,
2. Even kite power
3. A sweet turn
4. Choreographed feet
5. Looking in the right direction
6. Thinking right
So, the last part is now your timing.
You've initiated your turn, brought your kite around nice and smooth and exited of the turn. At this point your kite will be settled and you can feel that exact right moment to switch your feet.
The last step is to wave to the admiring crowd on the beach who are all applauding your great talent and skill!
A FINAL WARNING!!
If you're already ripping on your twintip, you need to understand you're going to be in for some frustration. Personally, I almost gave it away as "too hard", but am absolutely stoked I stuck with it.
For a start, accept you're going to fall in lots. You will have some really rooted sessions where you feel like a complete kook. You might even feel like you've wasted a precious session where you could have been ripping it up.
Balance this by having a rest and jumping back on your twinnie for some ripping fun again.
The key is, it takes a few sessions to get this gybing business sussed, and accepting that you won't be a pro on your first day out means you can go easy on yourself and can enjoy the whole learning process.
Now get out there and get wet!
Here's some great POV videos:


