Setting Up a Kite Camera
 Cheers to airhead for writing up this awesome article on setting up your own kitecam:
Update:
Pre-Built quality camera mount now available - read the details
After posting some of my recent kite cam photos I've had a few enquires about how to setup a camera on a kite, so I thought I would take the time to tell you how I did it. It is so easy and can be done for as little as $330!!
The Camera:
I'm using the compact point-and-shoot Pentax Optio W20. There is a newer model (W30) now available with a greater rated depth (5m) for underwater use. Both models are 7 megapixel allowing prints upto A3 in size and allowing you to crop captured images right down to get that perfect composition.
The main features that allows this camera to work as a kite cam are the fact that is can withstand a dunking in the water should you crash your kite. The other is it's interval shoot mode. In this mode you can program the camera to automatically take pictures at a set interval to as low as 10 seconds for up to 1000 shots or until the memory card is full.
Click here to view a detailed review of the camera.
The Kite Setup:
I bought a neoprene case for the camera and cut a hole in the front for the lens. I then cut a 50mm slit on either side of the case so I could thread a 50mm velcro strap though. I also glued some velcro to the back of the camera case for extra strengh when attaching it to the kite. For additional support, and to make the camera a really tight fit in the case, I inserted a thin piece of high density foam.


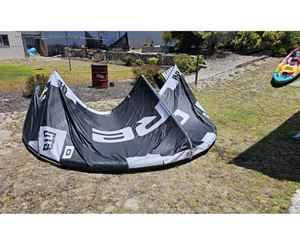
On the centre strut of my kite, about 150mm from the LE, I then glued another piece of 50mm velcro using some super strong contact adhesive. It is then simply a matter of setting the camera to interval shot mode, placing it inside the case and attaching to the kite using the velcro strap.
For added safety I also loop the camera's leash around the velcro valve strap on the strut. That way, if the camera was to fall out of the case, or the velcro comes undone, the camera will still be attached to the kite and not fall off and sink to the bottom of the ocean!. It also keeps the camera leash well out of the way so it doesn't end up in the shot.


Camera Settings:
When setting the camera up in interval shot mode you have the option of setting a start time. I usually set it to 15 minutes which then gives me time to get out on the water and warmed up before the camera fires up.
Other settings I use are:
Interval: 10 seconds
No of Shots: 1000
Mode: Sports
Sensitivity: ISO 100 (best balance of picture quality and shutter speed)
Metering: Multi Segment
Quality: *** (Best)
White Balance: Auto
Zoom: 0 - 1.0x
With the camera firing every 10 seconds you will end up with over 700 shots after a 2 hour session! Out of these you should have at least 15-30 decent ones.
With the shots that I keep I have to also photoshop them to adjust the brightness/contrast as they nearly always look over exposed probably due to the multi-segment metering combined with the glare from the water.
Useful Links:
All too hard? Check out the new quality fully adjustable Kite Camera Rig
Read about the KiteCam rig - no damage to your kite, and professionally made.

Kitesurfing
Australian Kitesurfing Shops & Schools
Need to find a kiteboarding store or kiteboarding school for lessons - all stores listed here

